
How to create a plan in RoninBox
To create a plan in RoninBox, go to Subscriptions, tap Create subscription and fill in the name, price and plans. A plan is what the member is charged: it combines a price and one or more plans, which set which activities they can do and how many classes they get.
Transcript
In the menu, under Plans and shop, open Subscriptions. Here are your gym’s plans: what you charge your members.
Tap Create Subscription to open the form.
Enter the plan’s name and, right below it, its price.
Check the plans included in this plan. You can choose more than one.
There are two optional fields. One limits the classes the member can book while a payment is pending. The other, the previous subscription, is used to update prices.
When everything looks right, tap Save. The plan can now be assigned to your members.
Only the gym admin sees this screen. You’ll notice the menu says “Subscriptions” and the rest of the app says “plan”: they’re the same thing.
What a plan includes
Section titled “What a plan includes”- Name and price.
- Plans: the ones it includes. A plan can combine several, for example a monthly plan and a plan for another activity.
- Maximum classes with pending payment (optional): how many classes the member can book while their monthly fee is still unpaid. Empty means no limit.
- Previous plan (optional): used to update prices. It’s explained in chained plans.
- Location restriction (only if your gym has several locations): if you choose one, members on this plan can only book classes at that location.
- Show on the gym’s website and its description (optional): see the plan on the gym’s website.
How to create a plan
Section titled “How to create a plan”-
Open Plans and shop and go to Subscriptions. You’ll see the list of plans with their plans, price and type.
-
Tap Create subscription (mark 1).
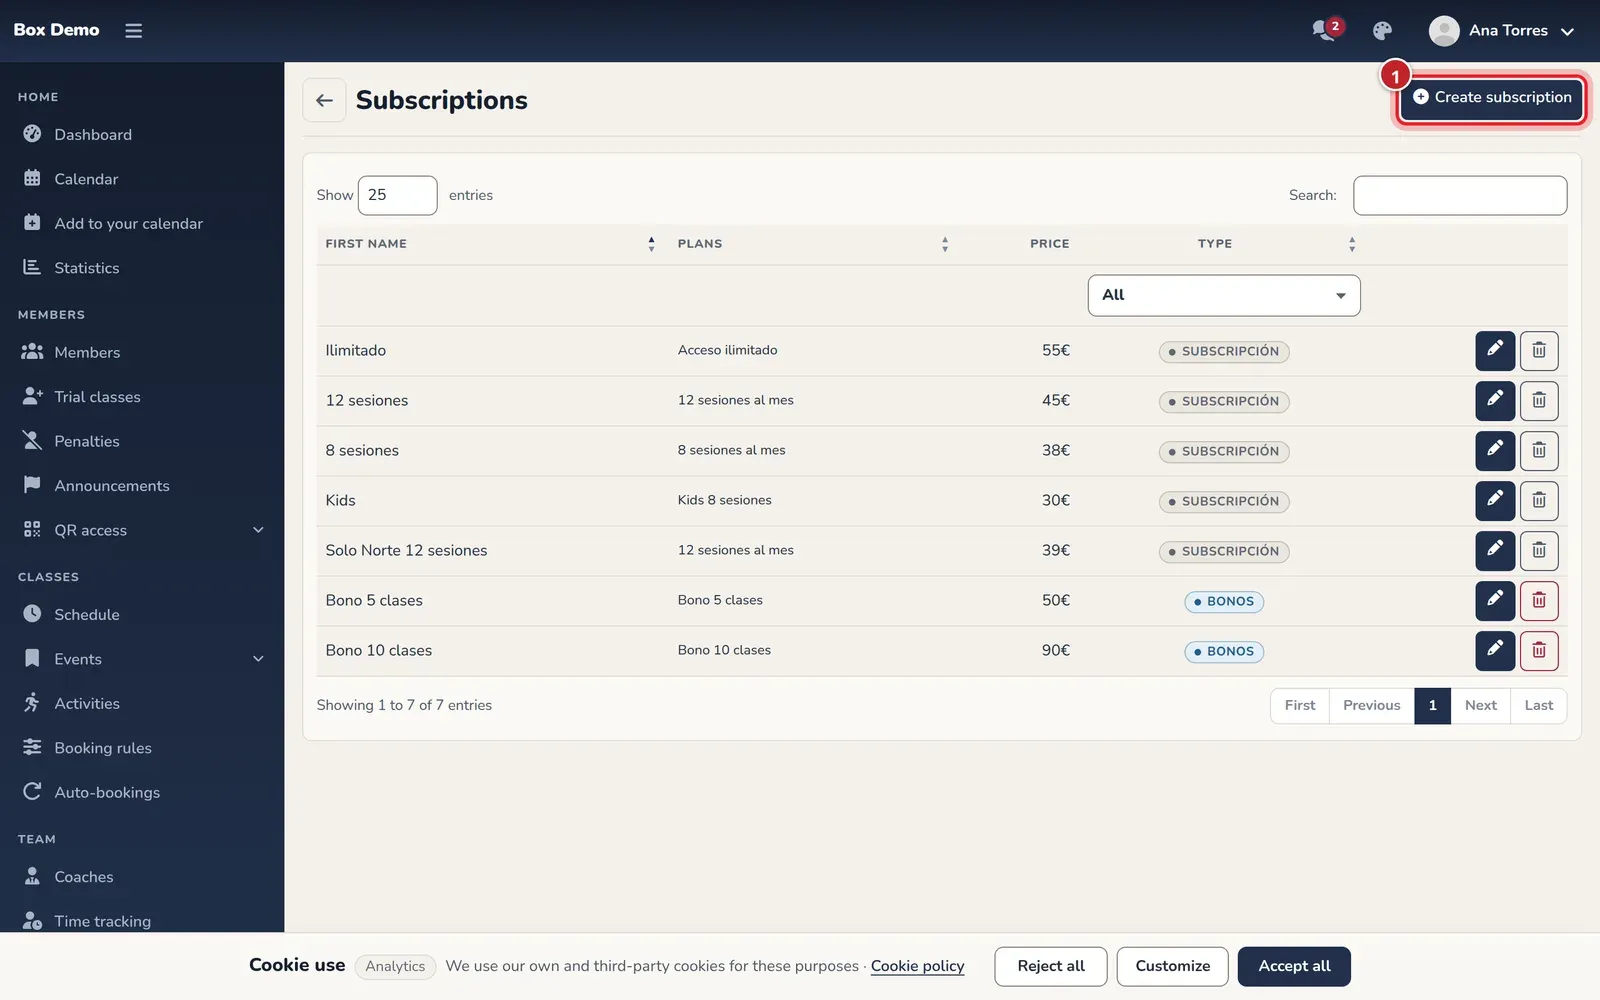
The list of plans. The create button is at the top right. -
Enter the Name (mark 1) and the Price (mark 2).
-
If you want a cap on classes while a payment is pending, fill in Maximum classes with pending payment (empty = no limit) (mark 3). If not, leave it empty. Right below are Show on the gym's website and Website description: check it only if you want the plan to appear on the gym’s website.
-
Leave Previous subscription (mark 4) blank, unless this plan replaces another one. If your gym has several locations, Restrict to location also appears here.
-
Check the Plans it includes (mark 5).
-
Tap Save (mark 6).
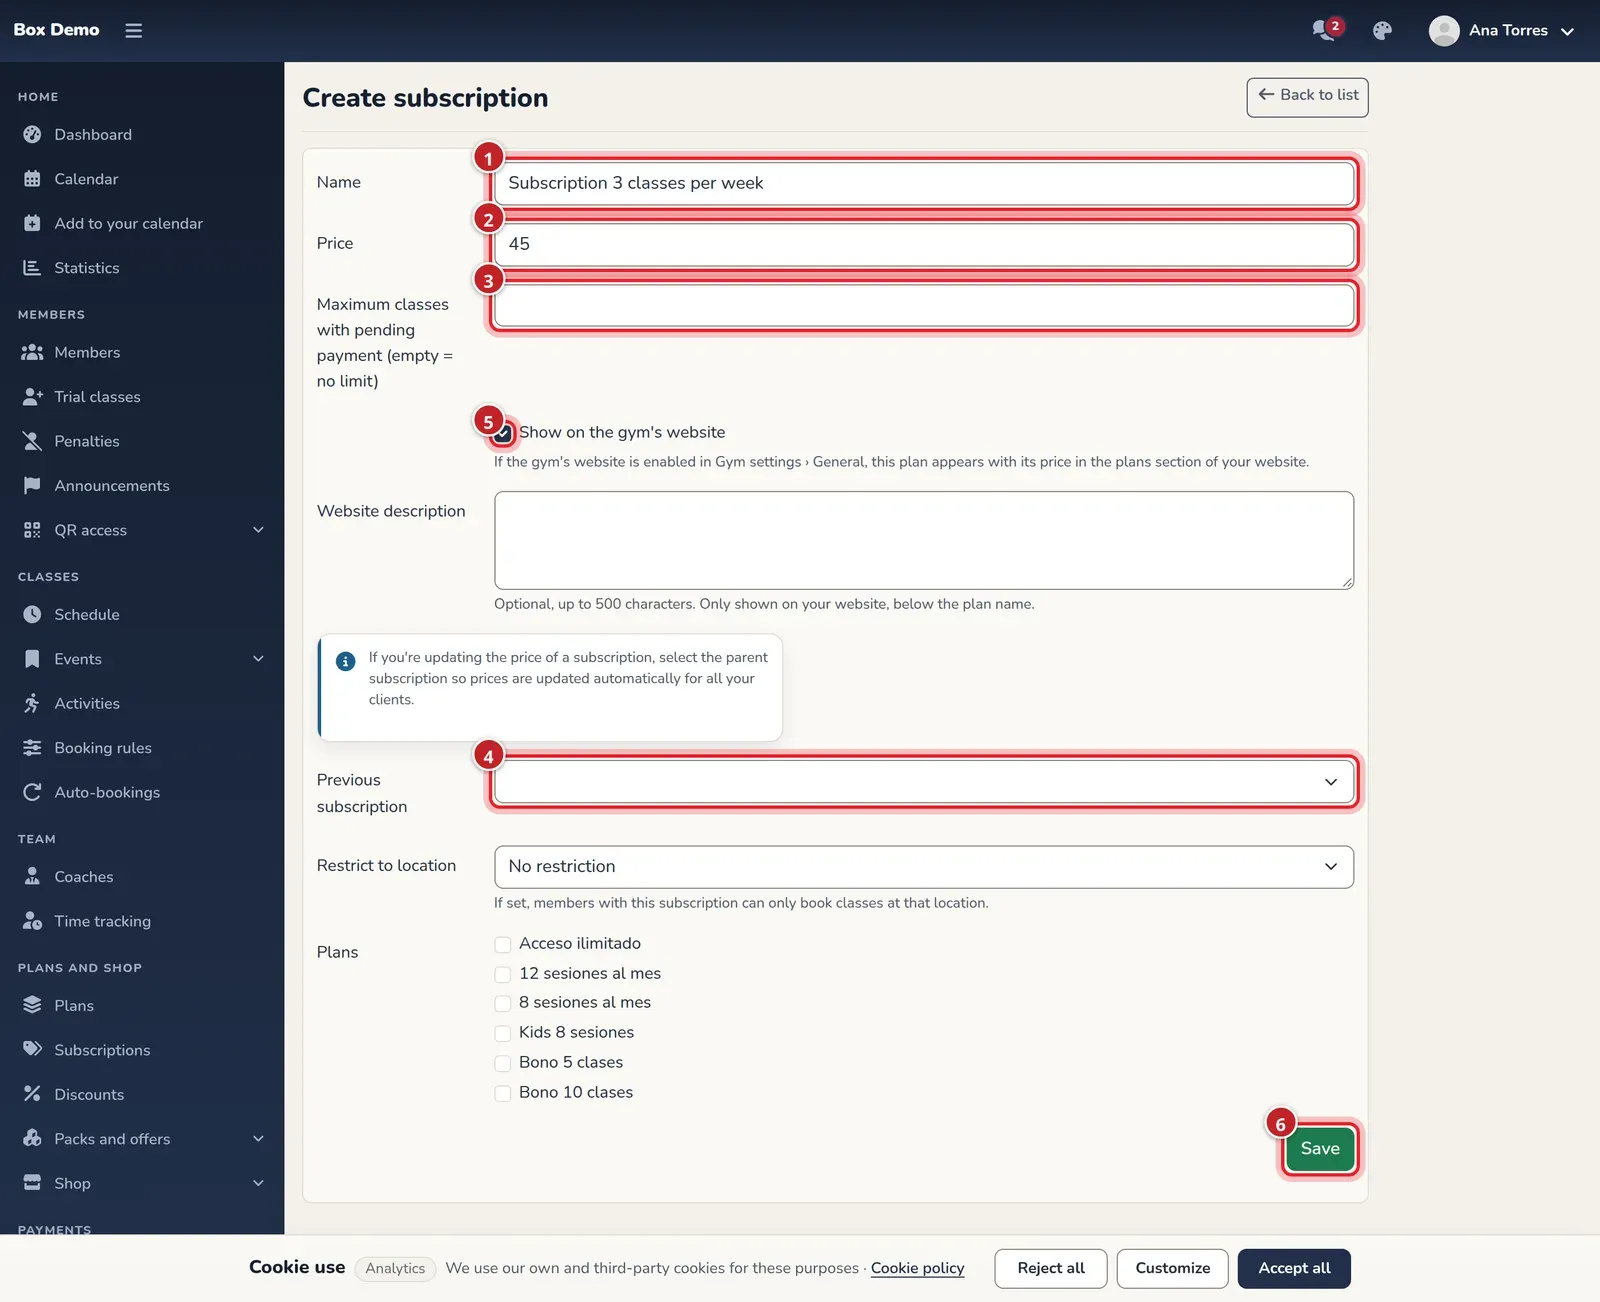
The complete form. The numbers match the steps.
When you save, you go back to the list and the plan can now be assigned to members, see assign a plan.
Edit a plan
Section titled “Edit a plan”In the list, the pencil on each row opens a short form with Name, Maximum classes with pending payment (empty = no limit) and the two website fields: Show on the gym's website and Website description. The price, plans and location can’t be changed after it’s created. If you need a different price, create a new chained plan.
The plan on the gym’s website
Section titled “The plan on the gym’s website”If your gym publishes its schedule and plans on its website, a plan only appears there when you check Show on the gym's website. It’s unchecked by default, so no plan shows up on your website unless you decide so. In Website description you can optionally write a text of up to 500 characters that appears on your website below the plan’s name. It isn’t used inside the app. Both fields are available when creating and editing the plan. See Schedule and plans on your website.
Delete a plan
Section titled “Delete a plan”The trash can on each row works differently depending on the case, and the app explains it to you before you confirm:
- If nobody has used it, it’s deleted permanently.
- If members or monthly fees use it, it’s marked as Deleted but keeps its data. In the type column you can filter by deleted ones.
- If it’s the child of another plan, you can choose between Revert to parent or Delete (soft). We explain it in chained plans.
Common mistakes
Section titled “Common mistakes”- It won’t let me save. Check that you’ve entered a name and price and checked the plans.
- I want to raise the price and can’t find where. The price can’t be edited: create a new plan and choose the old one as the previous plan.
- I don’t see any plan to check. Create it first, see create a plan.