
Locations: manage multiple locations in RoninBox
RoninBox locations are for gyms with more than one site: each location is a site with its own address, color, and description. If your gym has only one site, you don’t need to create any.
What changes when there are multiple locations
Section titled “What changes when there are multiple locations”The app treats the gym as having multiple locations when there are two or more visible locations. In that case:
- The admin dashboard shows one tab per location: see Home dashboard.
- The calendar can be filtered by location, and members can set theirs as their default location.
- Each member also has a location assigned by the gym, which counts for payments and lists. You choose it when you create the member and change it from their profile. It doesn’t depend on what the member views in their calendar.
- Each class, schedule, and plan can belong to a specific location. A plan restricted to one location only allows booking classes at that location.
- Each location can open next week’s bookings on a different day and time: see Location-specific booking opening.
With only one visible location, or none, the gym works as usual and these options don’t appear.
How to create a location
Section titled “How to create a location”-
Open Gym settings and go to Locations.
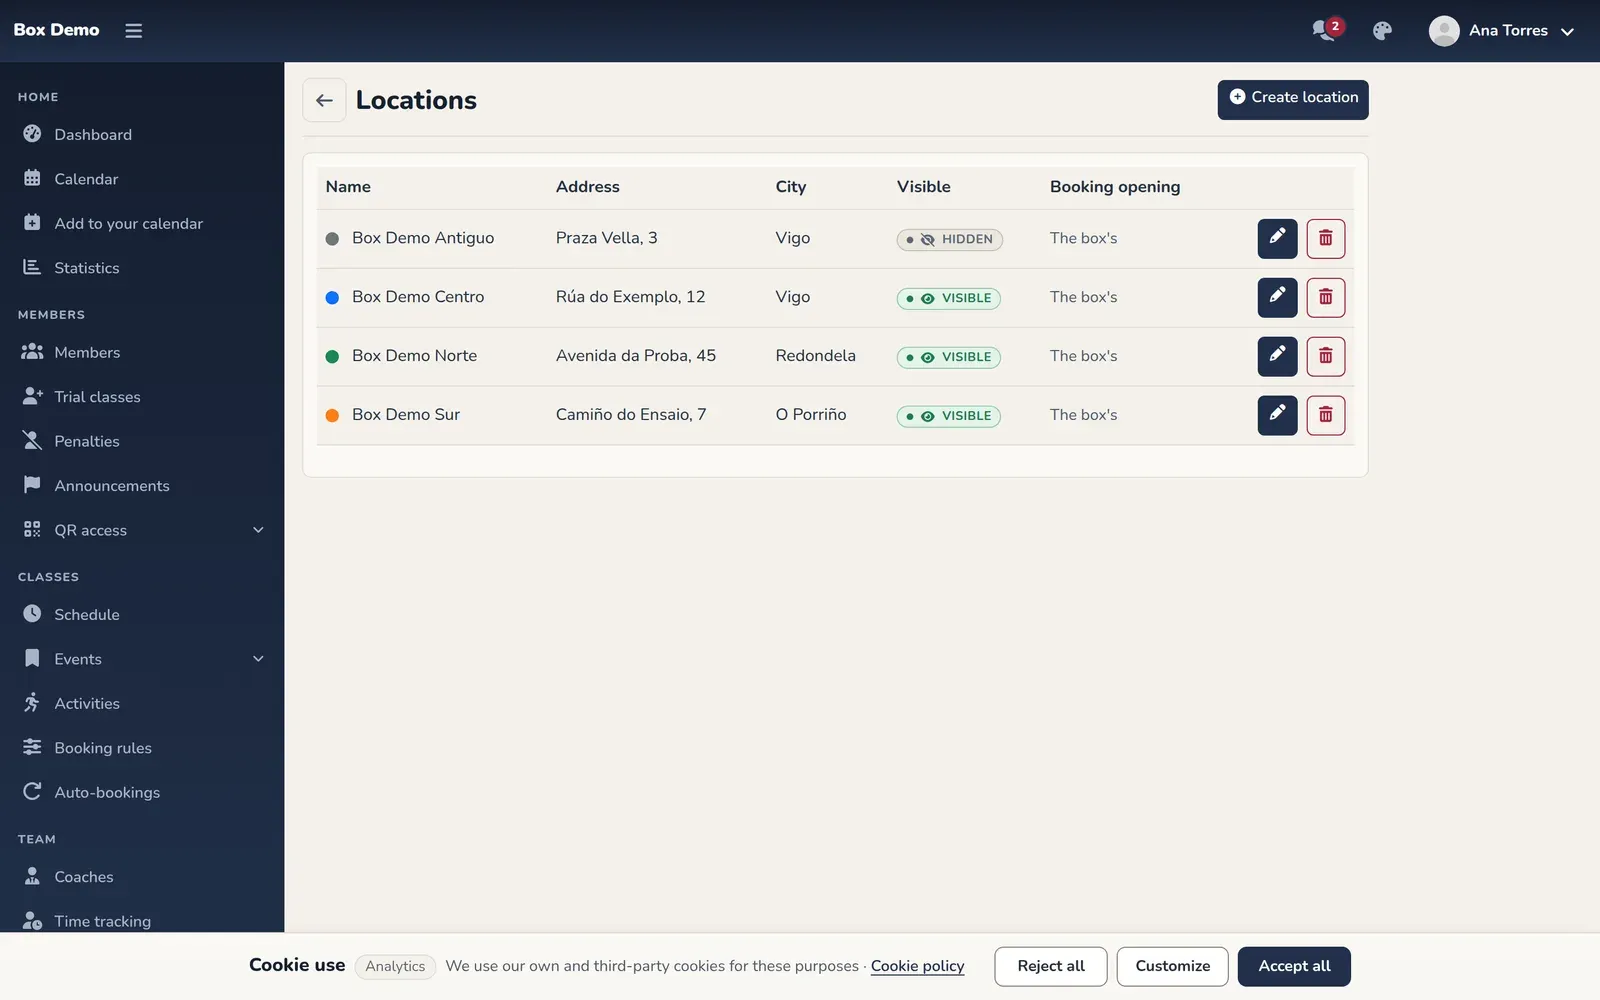
The list of locations, with each one's color and status. -
Tap Create location.
-
Fill in the form. Only the name is required.
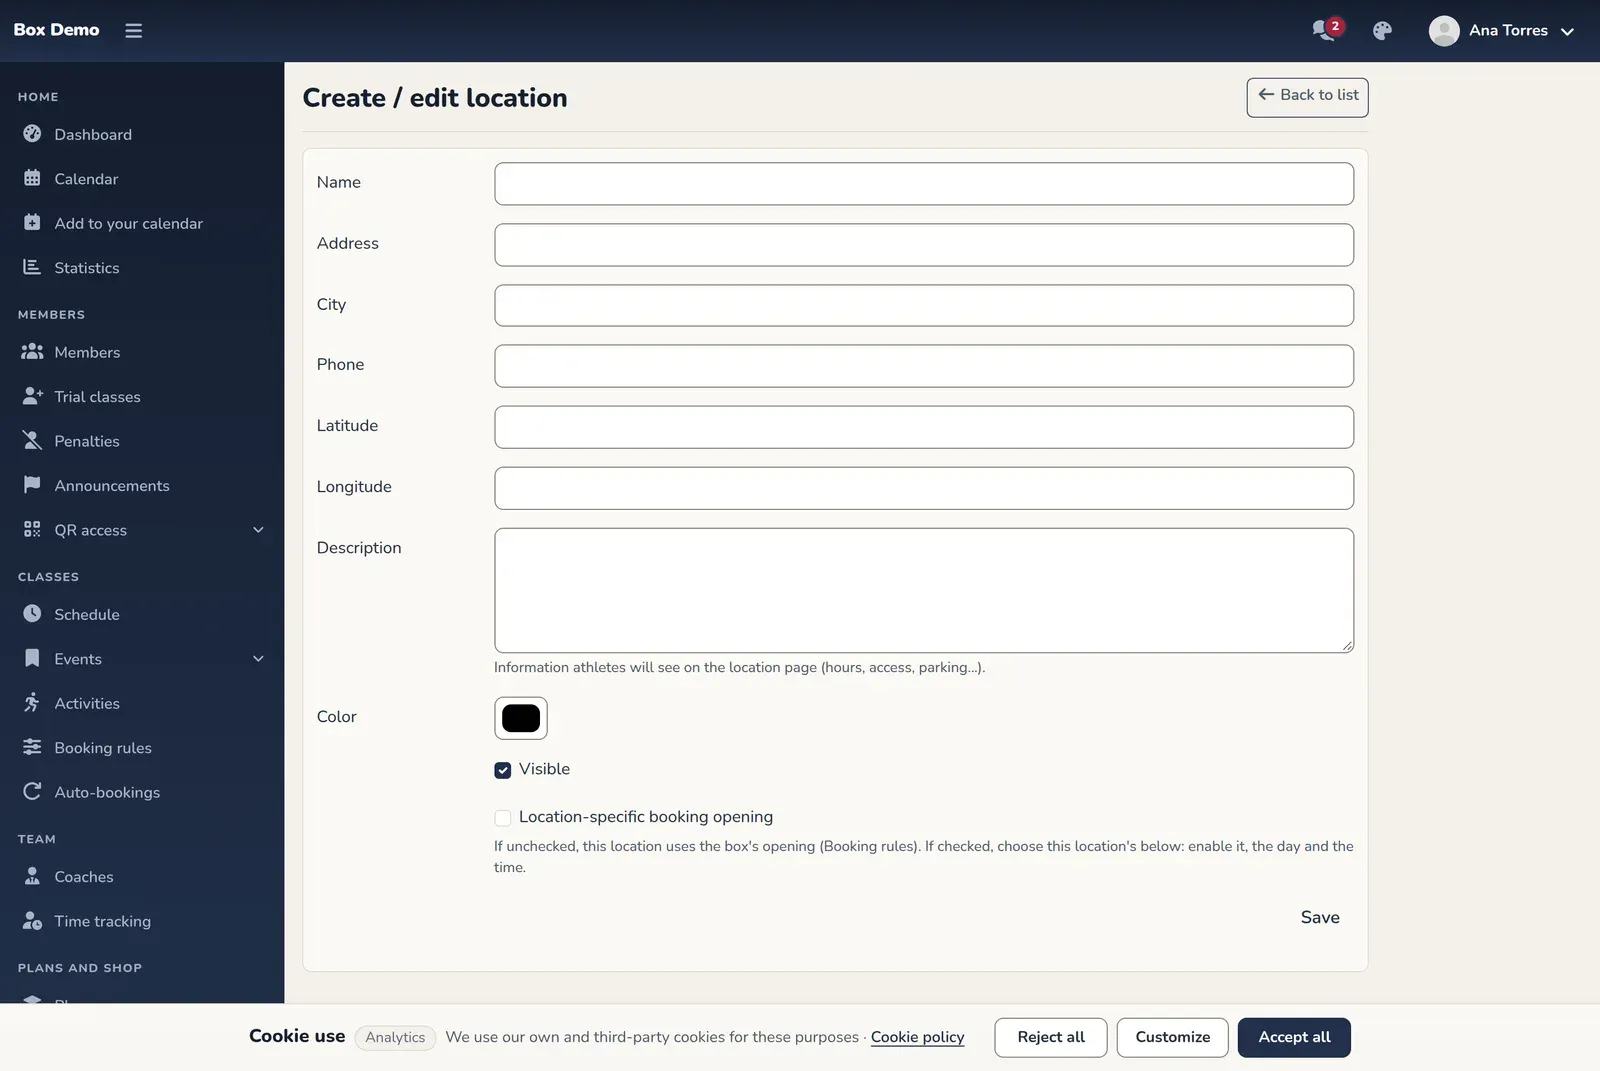
The location form. -
Tap Save.
The form fields
Section titled “The form fields”- Name. What the location is called.
- Address, City, and Phone. Shown on the location’s page.
- Latitude and Longitude. Used for the "View on map" link.
- Description. Information members will see on the location’s page: hours, access, parking.
- Color. The color that identifies the location in the list.
- Visible. This box is checked by default when you create a location. Leave it checked so the location counts and is shown. In the list it appears as Visible or Hidden. A hidden location doesn’t count when deciding whether the gym has multiple locations and doesn’t appear in the dashboard tabs.
- Location-specific booking opening. Unchecked (the default), the location uses the gym’s weekly opening. Checked, its own fields appear: the next section explains them.
Location-specific booking opening
Section titled “Location-specific booking opening”By default, all locations open bookings at the time set by the weekly opening in Booking rules. If a location needs a different time, for example because it publishes its schedule later, give it its own:
-
In the list of locations, tap the location’s pencil icon.
-
Check Location-specific booking opening. Three more fields appear.
-
Leave Weekly booking opening checked and choose the Opening day and Opening time for that location. If you uncheck it, that location’s classes are always open, even if the gym has an opening time.
-
Tap Save.
In the list, the Booking opening column shows which rule each location follows: The box's, or Custom with its day and time. Members see the countdown on that location’s classes and, on their profile, when their bookings open. To go back to the gym’s rule, uncheck the box and save.
Edit or delete
Section titled “Edit or delete”In the list, the pencil opens the form and the trash can deletes the location, after confirmation. If the location already has classes, schedules, plans, or members using it as their default, its history isn’t lost: it just stops appearing in the list.
Common issues
Section titled “Common issues”- I created a second location and don’t see tabs on the dashboard. Check that both are marked as visible.
- It won’t let me create or delete a location. That’s the billing notice described above. Wait a few minutes and try again.